If you’re craving a rich, chocolatey treat that’s simple to make and absolutely delicious, you’re in the right place. Let me share my Easy Chocolate Brownies Recipe that’s perfect for when you want that perfect fudgy, gooey brownie without fussing over complicated steps. I promise, once you try this, you’ll be reaching for your apron again and again!
Why You’ll Love This Recipe
- Effortless to Make: You only need a few ingredients and minimal steps – no mixer required!
- Perfect Texture: Achieve a fudgy, gooey center that melts in your mouth every time.
- Customizable Add-Ins: Whether you love nuts or extra chocolate, this recipe adapts beautifully.
- Kid-Friendly & Crowd-Pleasing: It’s always the first tray gone at any gathering!
Ingredients & Why They Work
This Easy Chocolate Brownies Recipe comes together with simple pantry staples that deliver big on flavor and texture. Each ingredient plays its part to create that classic brownie experience you’re craving.
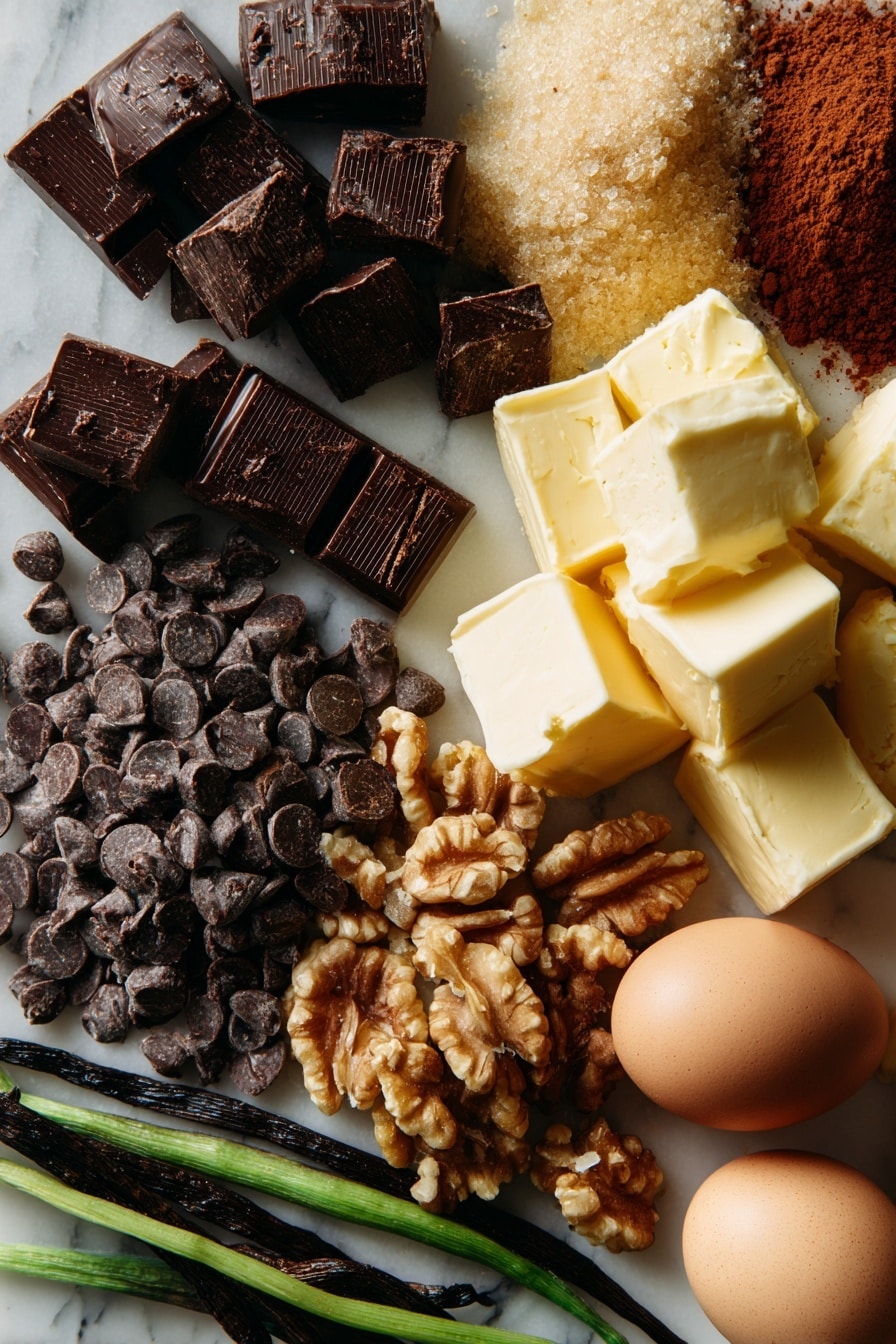
- Unsalted Butter: Provides richness and a smooth mouthfeel; using unsalted lets you control the saltiness perfectly.
- Dark Chocolate Chips: Melts down to create a velvety chocolate base; opt for quality chips for a deeper flavor.
- Brown Sugar: Adds sweetness and a touch of molasses flavor that keeps the brownies moist and chewy.
- Eggs: Bind everything together and help achieve that fudgy texture we’re after.
- Vanilla Extract: Just a splash brightens and rounds out the chocolate intensity.
- Plain Flour: Gives structure without making the brownies cakey or dry.
- Cocoa Powder: Boosts chocolate flavor and adds that beautiful deep color.
- Pinch of Salt: Balances sweetness and enhances all the chocolate notes.
- Dark Chocolate Block (optional): I love chopping this into chunks to add melty surprises throughout the brownies.
- Walnuts (optional): If you’re a nut fan, these add a lovely crunch and earthy dimension.
Note: Exact ingredients and measurements are listed in the recipe card below.
Make It Your Way
One of the reasons I adore this Easy Chocolate Brownies Recipe is how flexible it is. Over time, I’ve tweaked it here and added stuff there – and that’s the beauty of brownies! Feel free to make it your own.
- Variation: I often swap walnuts for pecans or skip nuts altogether if I’m sharing with nut-allergic friends – still delicious every time.
- Dietary Modification: I’ve experimented with gluten-free flour blends, which work well but can slightly change the texture.
- Seasonal Flair: During holidays, I swirl in some peppermint extract or sprinkle with sea salt flakes on top for extra fancy flair.
- Level of Gooeyness: Adjust baking time to suit your preference from super gooey to slightly cakey fudge – the recipe covers all these options.
Step-by-Step: How I Make Easy Chocolate Brownies Recipe
Step 1: Prep Your Pan and Melt the Chocolate
Start by preheating your oven to 180°C (350°F), or 160°C if you’re using fan-forced heat. Line an 8-inch square baking tin with parchment paper and spray it lightly with oil — trust me, this makes lifting out the brownies easy, and cleanup is a breeze. Then, pop your butter and dark chocolate chips into a heatproof bowl. Microwave in short 30-second bursts, stirring in between, until it’s completely melted smooth and glossy. I find this takes me about 1 minute and 30 seconds total, but ovens vary—just watch carefully so you don’t scorch the chocolate.
Step 2: Mix in Sugar, Eggs, and Vanilla
Once your chocolate mixture is silky, stir in the brown sugar and vanilla extract until combined. Now add the lightly beaten eggs one at a time, mixing well after each addition. This part is key for that molten brownie texture—the mixture should become thick, shiny, and completely smooth. If you don’t mix well, you might end up with pockets of egg, which nobody wants!
Step 3: Add Dry Ingredients and Optional Chunks
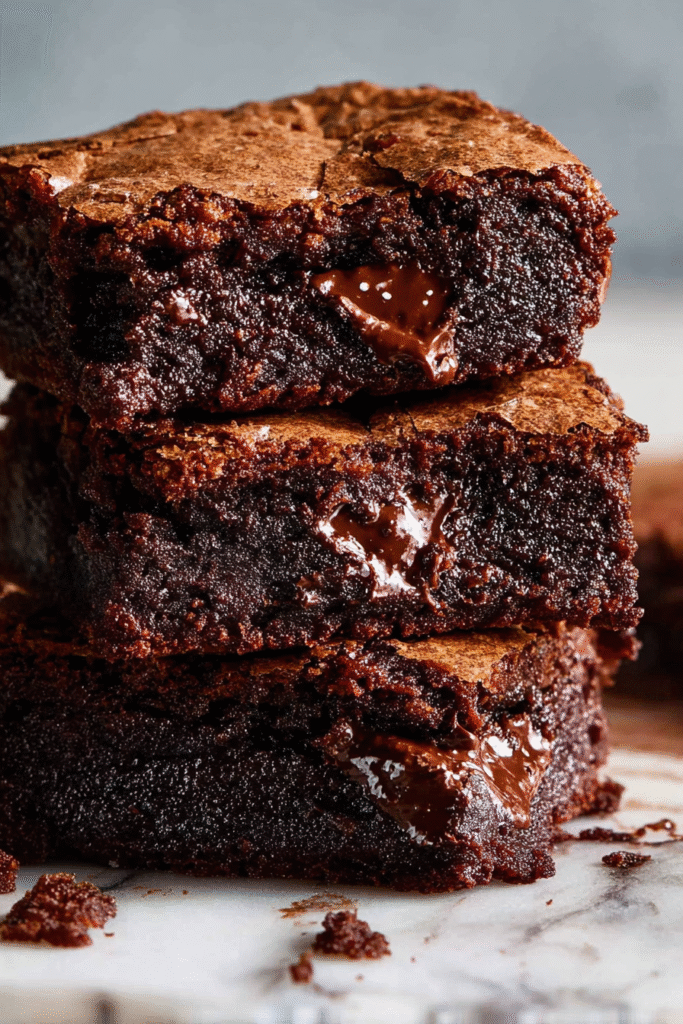
Next, sift or whisk your plain flour, cocoa powder, and a pinch of salt together, then gently fold it into the chocolate mixture until just combined. Don’t overmix here—you want the batter smooth, but still tender. Now comes the fun part: stirring in your chopped dark chocolate block chunks. These melt down during baking for gorgeous pockets of gooeyness. Alternatively, toss in chopped walnuts if you prefer a bit of crunch.
Step 4: Bake to Perfection
Pour that luscious batter into your prepared pan and spread evenly. Baking time is your secret weapon for customizing texture: I bake my brownies for 28 minutes to get a perfectly fudgey but moist center, but if you want super gooey brownies, 24 minutes is your friend. For something a bit more cakey yet still rich, go up to 32 minutes. Pro tip: if you didn’t add the extra chocolate chunks inside, shave off about 2 minutes from the bake time. Always test with a toothpick — it should come out with just a few moist crumbs, not wet batter.
Step 5: Rest, Cool, and Serve
Once out of the oven, let your brownies rest for 10 minutes in the pan—this helps them set and makes them easier to lift out using the parchment overhang. Then transfer to a wire rack and cool for at least 20 minutes before slicing. It’s tough to wait, but cutting while warm can cause breakage or messier squares.
Pro Tips for Making Easy Chocolate Brownies Recipe
- Use Quality Chocolate: You don’t need fancy ingredients, but good dark chocolate really elevates these brownies.
- Don’t Skip the Resting Time: Waiting to cool helps brownies firm up and slice cleanly, avoiding crumbly edges.
- Watch Your Oven Closely: Oven temperatures can vary; check early to avoid overbaking and losing that perfect fudgy texture.
- Customize Carefully: Adding nuts or extra chocolate chunks can affect baking times slightly; adjust accordingly to keep texture on point.
How to Serve Easy Chocolate Brownies Recipe
Garnishes
I love topping my brownies with a light dusting of powdered sugar or a sprinkle of flaky sea salt to highlight the bittersweet chocolate. Sometimes, I add a dollop of whipped cream or vanilla ice cream on the side—so decadent! Fresh raspberries also add a lovely tart contrast that cuts through the richness beautifully.
Side Dishes
Pair your brownies with a cold glass of milk — a classic for a reason! For adult occasions, a robust cup of coffee or espresso balances the sweetness perfectly. If you want to get fancy, a drizzle of raspberry coulis or a scoop of salted caramel ice cream makes a show-stopping dessert.
Creative Ways to Present
I’ve served these brownies cut into bite-sized squares on pretty platters topped with edible flowers for garden parties. For birthdays, I like stacking them with a layer of frosting or chocolate ganache in between for a brownie “cake.” Wrapping individual squares in parchment makes a sweet gift treat too!
Make Ahead and Storage
Storing Leftovers
I always keep my brownies in an airtight container at room temperature. They stay perfectly moist and delicious for up to 4 days, though honestly, they never seem to last that long in my house! If you live in a warmer climate, storing them in the fridge can help, just bring them back to room temp before enjoying for best texture.
Freezing
When I’m making a big batch, I often freeze leftover brownies. I wrap individual squares tightly in plastic wrap, then pop them in a freezer-safe bag. They freeze well for up to 3 months and thaw quickly at room temperature or with a few seconds in the microwave.
Reheating
Reheating brownies is easy and brings back that fresh-baked warmth. I usually microwave a square for about 15 seconds or warm them briefly in a low oven wrapped in foil. This makes them soft and gooey again, like they just came out of the oven.
FAQs
-
Can I use milk chocolate instead of dark chocolate in this Easy Chocolate Brownies Recipe?
You can absolutely! Using milk chocolate will give your brownies a sweeter, creamier flavor. Just keep in mind that milk chocolate has more sugar and less cocoa, so the overall bake might be less intense in chocolate flavor. You might want to reduce any added sugar slightly or mix milk and dark chocolate for balance.
-
What’s the best way to tell when my brownies are done?
The classic toothpick test works wonders here: insert a clean toothpick into the center of the brownies. For gooey brownies, it should come out with moist crumbs attached but no raw batter. For those who prefer a fudgy but more set texture, a few sticky crumbs are perfect. Don’t wait until it comes out clean or you’re risking cakey brownies!
-
Can I make this recipe vegan?
For a vegan version, you can substitute butter for vegan margarine or coconut oil and use flax eggs (1 tbsp ground flaxseed + 3 tbsp water per egg). Choose dairy-free chocolate chips to keep things fully plant-based. Note that texture and flavor might differ slightly, but still very tasty!
-
Why do my brownies sometimes turn out cakey instead of fudgy?
Cakey brownies usually happen if you add too much flour, overmix the batter, or bake too long. For this Easy Chocolate Brownies Recipe, be gentle when folding in dry ingredients and keep a close eye on your baking time. Also, using the right ratio of butter and eggs is crucial to that luscious fudgy texture you want.
Final Thoughts
This Easy Chocolate Brownies Recipe holds a special place in my kitchen because it’s my go-to for instant happiness—whether I need a quick dessert fix or a batch to impress friends. It’s simple, forgiving, and so tasty that it feels like a little celebration with every bite. I hope you’ll love making it as much as I do, and maybe even tweak it your way to make it your own brownie classic!
Print
Easy Chocolate Brownies Recipe
- Prep Time: 10 minutes
- Cook Time: 28 minutes
- Total Time: 38 minutes
- Yield: 9 servings
- Category: Dessert
- Method: Baking
- Cuisine: American
Description
Deliciously easy-to-make chocolate brownies with a rich, fudgy texture. This recipe uses melted dark chocolate and butter, combined with brown sugar and eggs to create a molten batter that’s baked to perfection. Optional mix-ins like chopped dark chocolate chunks or walnuts add extra indulgence and texture. Perfect for satisfying your chocolate cravings with a simple homemade treat.
Ingredients
Main Ingredients
- 200g unsalted butter (14 tbsp / 1 3/4 US sticks)
- 200g dark chocolate chips (7 oz / 1 1/4 cups)
- 1 cup brown sugar (175g), loosely packed
- 3 eggs, lightly beaten
- 1 tsp vanilla extract
- 1/2 cup plain flour (75g)
- 1/4 cup cocoa powder (30g)
- Pinch of salt
Optional Stir-in Ingredients
- 180g dark chocolate block/bar, chopped into chunks (bittersweet or semi-sweet, cooking chocolate)
- 1.5 cups roughly chopped walnuts (or other nuts)
Instructions
- Preheat the oven: Set your oven to 180°C/350°F (160°C fan forced) and prepare a 20cm (8 inch) square baking tin by spraying it with oil and lining it with parchment or baking paper with an overhang for easy removal.
- Melt butter and chocolate chips: Place the butter and chocolate chips in a heatproof bowl and melt in the microwave in 30-second bursts, stirring in between until smooth and fully melted, which should take about 1 minute 30 seconds total.
- Add sugar, vanilla, and eggs: Stir the brown sugar and vanilla extract into the melted mixture, then mix in the lightly beaten eggs until the batter is smooth and molten.
- Incorporate dry ingredients: Add the plain flour, cocoa powder, and pinch of salt to the batter and stir gently until everything is combined smoothly.
- Mix in optional extras: Fold in the chopped dark chocolate chunks or walnuts if using, then pour the batter evenly into your prepared baking tin.
- Bake the brownies: Bake for 28 minutes for a fudge-like but moist texture, which is the recommended doneness. For gooey centers bake for 24 minutes or for a moist fudge-cake consistency bake for 32 minutes. If you do not add extra chocolate chunks, reduce bake time by 2 minutes.
- Rest and cool: Allow the brownies to rest in the pan for 10 minutes before lifting out using the parchment overhang. Let them cool completely for at least 20 minutes before slicing.
- Storage: Store brownies in an airtight container at room temperature for up to 4 days or freeze for up to 3 months.
Notes
- Using parchment paper with an overhang makes it easy to lift out the brownies in one piece.
- Microwave melting in short bursts avoids burning the chocolate and butter.
- The toothpick test can help check doneness: a few moist crumbs on the toothpick indicate fudgy brownies.
- Chopped nuts can be swapped for any preferred variety or omitted for nut-free brownies.
- For a vegan version, substitute butter and eggs with plant-based alternatives.
- Allow the brownies to cool fully before cutting to prevent crumbling.

