
If you’re anything like me and have a serious sweet tooth paired with a love for peanut butter, you’re going to want to stick around for this one. This Chocolate Peanut Butter Balls Recipe has honestly become my go-to treat whenever I want something that’s indulgent without a ton of fuss. Creamy, chocolatey, with just the right touch of sweetness and saltiness—these little balls of joy really hit the spot. Plus, they’re super easy to make, so you can whip up a batch for parties, holidays, or just because. Trust me, once you try this, they’ll become your favorite snack too!
Why You’ll Love This Recipe
- Simple Ingredients: You probably already have everything in your pantry, making this a no-stress dessert.
- No-Bake Magic: No oven required! Just mix, shape, dip, and chill — perfect for a quick fix.
- Customizable Flavors: Roasted peanuts, white chocolate drizzle, or sprinkles — tweak it to your liking.
- Crowd Pleaser: These are irresistible for kids and adults alike, making them great for gatherings or surprises.
Ingredients & Why They Work
The beauty of this Chocolate Peanut Butter Balls Recipe lies in its harmonious balance—the creamy peanut butter blends perfectly with rich chocolate, while powdered sugar and vanilla add that sweet, comforting hint. Each ingredient plays a vital role, and I’ll share a little insight on why they matter.
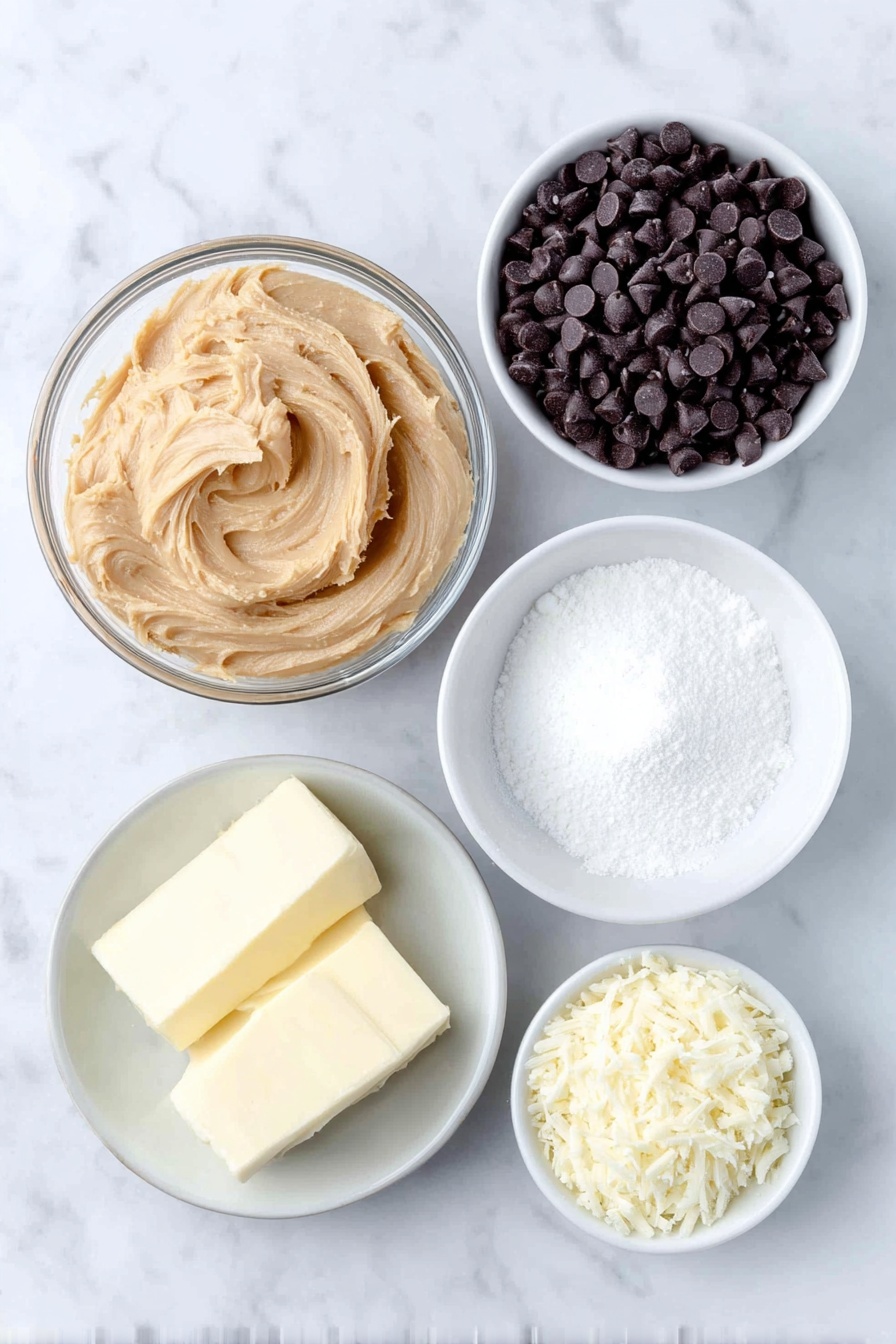
- Chunky or creamy peanut butter: Use what you prefer! Chunky adds a delightful crunch, creamy makes the texture smooth and luscious.
- Butter (softened): Helps bind and add richness, plus keeps the texture soft enough to roll easily into balls.
- Powdered sugar: Provides sweetness and structure—it’s what gives the peanut butter mixture that nice firmness.
- Vanilla extract: A little splash boosts the overall flavor, making everything taste just right.
- Chocolate chips: Melted to coat the balls, creating that luscious, shiny shell that makes them feel extra special.
- Paraffin wax: Adds gloss and firmness to the chocolate coating—if you prefer, candy melts can be a simpler alternative.
- Sprinkles (optional): For a festive touch—great for holidays or just a fun pop of color.
Make It Your Way
One of the things I adore about this Chocolate Peanut Butter Balls Recipe is how easy it is to make it your own. Whether you prefer your peanut butter balls more decadent, healthier, or with a fun twist, there’s room for your creativity here.
- Crunch factor: I personally like to mix creamy peanut butter with chopped roasted peanuts for added texture—it gives a satisfying bite.
- Chocolate variety: Dark chocolate works beautifully if you want something less sweet, while milk chocolate keeps it super creamy and indulgent.
- Dairy-free option: Swap out butter with coconut oil and use dairy-free chocolate chips for a vegan-friendly treat that still rocks.
- Flavor boosts: A sprinkle of sea salt on top before chilling really balances the sweetness and elevates the flavor.
Step-by-Step: How I Make Chocolate Peanut Butter Balls Recipe
Step 1: Mix up your peanut butter base
Start by combining the peanut butter, softened butter, powdered sugar, and vanilla extract in a large mixing bowl. Use a hand mixer or sturdy spoon to blend everything until smooth and well-combined. It might look a bit crumbly at first, but keep at it—soon it will come together in a dough-like consistency that’s easy to shape. If it feels too sticky, a bit of extra powdered sugar can help. This step is key because the right texture means your balls won’t fall apart later!
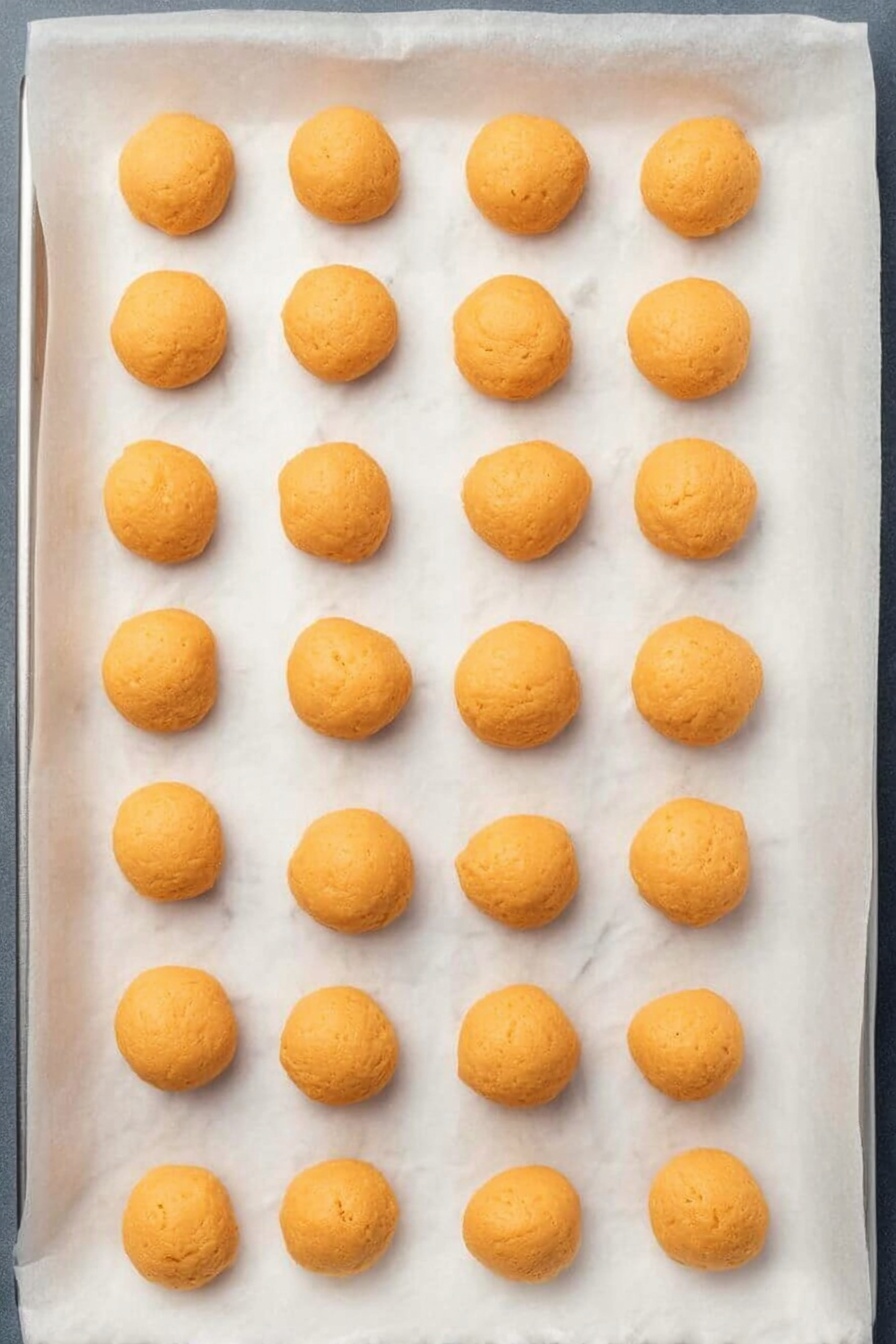
Step 2: Roll them into perfect little balls
Now, scoop out about a tablespoon of mixture at a time and roll it between your palms to form roughly 25 uniform balls. Don’t worry if they aren’t perfectly smooth—the slightly rustic look adds to their charm! I find using a cookie scoop helps keep sizes consistent, which is great for even coating and portion control.
Step 3: Melt chocolate with paraffin wax for that glossy dip
Bring a pot of water to a rolling boil and set up a double boiler by placing a heatproof bowl over it, making sure the water doesn’t touch the bottom. Add your chocolate chips and grated paraffin wax to the bowl, stirring constantly until fully melted and smooth. The paraffin wax gives the chocolate a shiny, firm finish that’s classic for this sort of candy. If you’d rather, candy melts are a fuss-free substitute—just melt those according to their package instructions and skip the wax.
Step 4: Dip and decorate
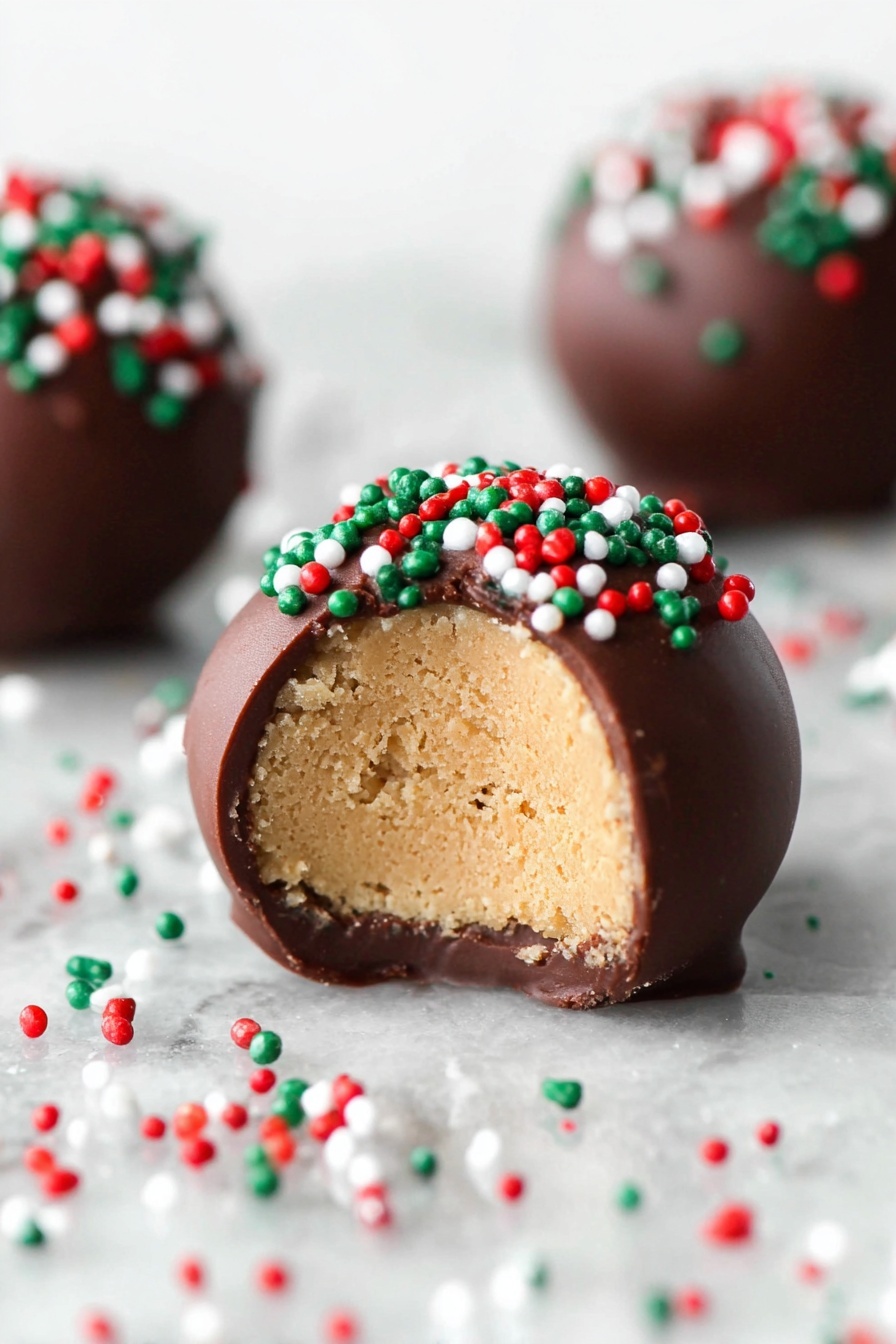
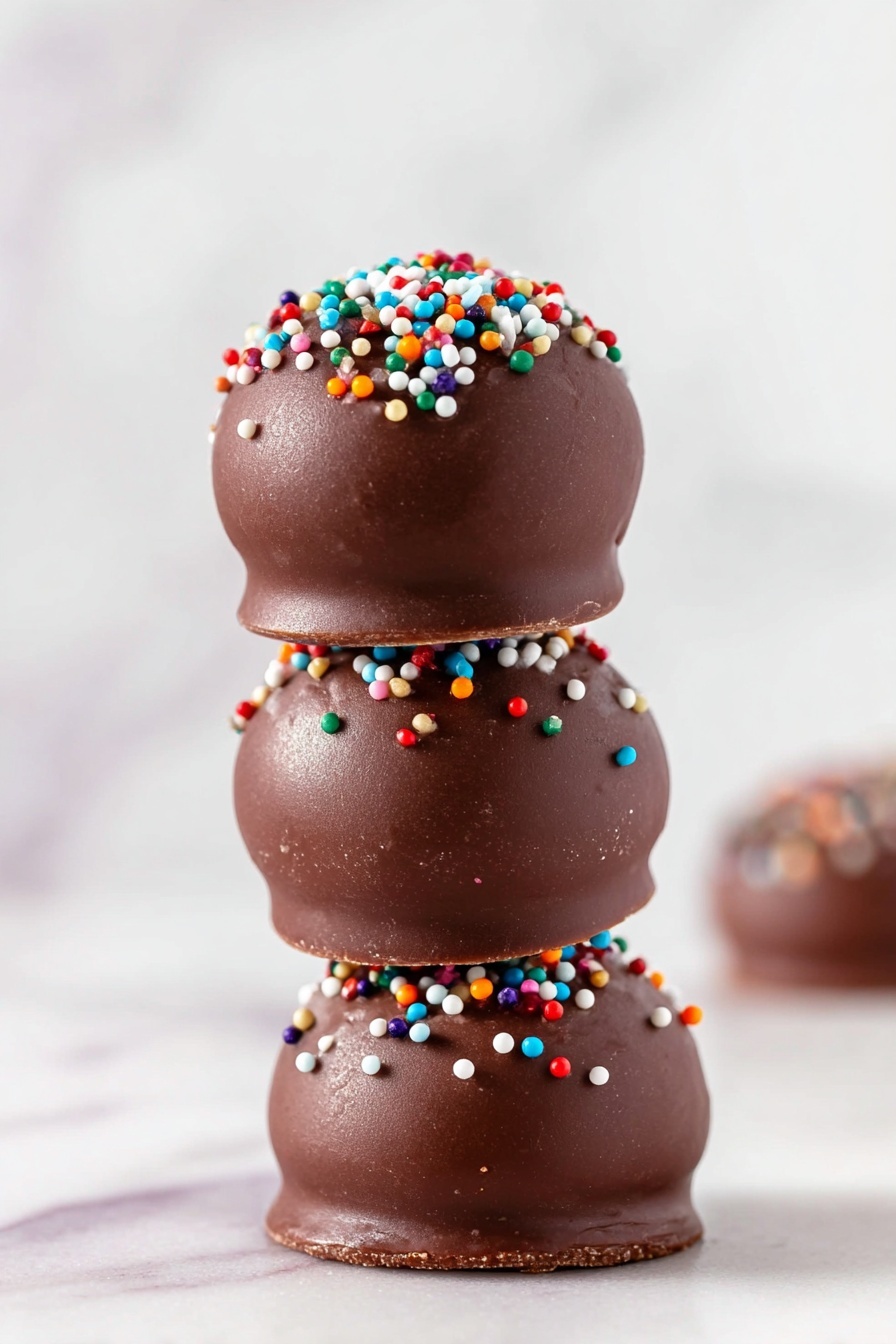
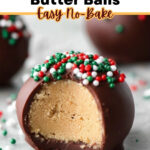
Use a spoon or fork to dip each peanut butter ball into the melted chocolate, making sure it’s thoroughly coated. Carefully set them on a baking sheet lined with wax or parchment paper. While the chocolate is still wet, sprinkle your festive sprinkles or drizzle with melted white chocolate for a pretty, professional look. This is my favorite part because it’s when these simple bites start turning into something festive and fun.
Step 5: Chill until firm
Pop your tray into the freezer for about 30 minutes. This step is crucial—it sets the chocolate shell so that when you bite in, you get that delightful snap and a creamy peanut butter surprise inside. If you leave them out too long, the chocolate may soften and get sticky, so chilling is your friend here.
Pro Tips for Making Chocolate Peanut Butter Balls Recipe
- Use room temperature butter: Soft butter blends better with peanut butter for a smoother mixture and easier rolling.
- Keep your hands cool: If the mixture gets too sticky while rolling, pop your hands under cold water before shaping for less mess.
- Double boiler magic: Melting chocolate slowly and gently prevents burning and keeps your coating silky and smooth.
- Freeze before dipping: For easier handling, sometimes I chill the peanut butter balls for 10 minutes before dipping to keep their shape intact.
How to Serve Chocolate Peanut Butter Balls Recipe
Garnishes
I love topping these with festive sprinkles or a drizzle of contrasting white chocolate. Sometimes, I sprinkle a tiny pinch of coarse sea salt on top just before the chocolate hardens—this little salt-spiked finish makes the sweet and salty flavor pop beautifully. For holiday occasions, red and green sprinkles are my go-to for an instant festive vibe.
Side Dishes
Although these peanut butter balls can be enjoyed solo, they also pair wonderfully with a cup of coffee or tea. I’ve even served them alongside a simple fruit platter or salted nuts during parties to balance their sweetness and keep things interesting.
Creative Ways to Present
For parties, I like to place these chocolate peanut butter balls in colorful mini cupcake liners for a polished look. Another fun idea is arranging them in a festive tin or glass jar layered with tissue paper for gifts. You can also stack them into a pyramid on a pretty cake stand with a dusting of cocoa or powdered sugar for a show-stopping dessert centerpiece.
Make Ahead and Storage
Storing Leftovers
I usually keep leftover peanut butter balls in an airtight container in the fridge. This way, they stay fresh and firm for up to two weeks. Just make sure to separate layers with wax or parchment paper to avoid sticking. It’s convenient when you want a quick snack or a last-minute treat!
Freezing
Freezing is a great option if you want to make a big batch ahead of time. Place the balls in a freezer-safe container with layers separated by parchment paper, and they’ll keep nicely for up to three months. When you’re ready to enjoy, just thaw them in the fridge overnight—easy and stress-free.
Reheating
Since these are no-bake and meant to be served chilled, I usually don’t reheat them. If the chocolate shell softens after sitting at room temperature, simply pop them back in the fridge or freezer for a few minutes to firm back up before serving.
FAQs
-
Can I make this Chocolate Peanut Butter Balls Recipe without paraffin wax?
Absolutely! Paraffin wax is traditionally used for a glossy finish and firmer texture, but you can substitute candy melts or just use chocolate chips alone. If you use candy melts, just melt them according to package instructions and skip the wax entirely—your peanut butter balls will still be delicious and smooth.
-
What’s the best peanut butter to use?
I usually go with creamy peanut butter for smoother balls, but chunky’s great if you enjoy some crunch. Avoid natural peanut butters with excess oil since they can make the mixture too slippery to roll well.
-
How should I store leftover chocolate peanut butter balls?
Store them in an airtight container in the refrigerator for up to two weeks. For longer storage, freeze them in a freezer-safe container with parchment paper layers for up to three months.
-
Can I use peanut butter alternatives for allergies?
Yes! Almond butter, sunflower seed butter, or cashew butter are great substitutes. Just adjust the powdered sugar amount slightly to get the right texture since these butters vary in consistency and taste.
Final Thoughts
I’ve made this Chocolate Peanut Butter Balls Recipe countless times, from weekday snacks to holiday gifts, and it’s always a hit. It’s one of those recipes I lean on when I want something quick but wildly satisfying. I really hope you enjoy making and sharing this as much as I do—there’s something special about giving friends and family a homemade treat that brings smiles with almost zero stress. So go ahead, dive in, and treat yourself to some chocolate peanut buttery happiness—you deserve it!
Print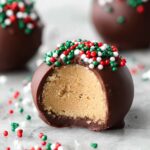
Chocolate Peanut Butter Balls Recipe
- Prep Time: 20 minutes
- Cook Time: 10 minutes
- Total Time: 30 minutes
- Yield: 25 servings
- Category: Dessert
- Method: Stovetop
- Cuisine: American
- Diet: Vegetarian
Description
Delicious no-bake Chocolate Peanut Butter Balls, combining creamy peanut butter and sweet powdered sugar covered in a smooth chocolate coating. Perfect for holiday treats or quick snacks.
Ingredients
Peanut Butter Mixture
- 1½ cups chunky or creamy peanut butter
- ½ cup butter, softened
- 2 cups powdered sugar
- 1 teaspoon vanilla extract
Chocolate Coating
- 12 oz bag of chocolate chips
- 2 tablespoons paraffin wax, grated (optional, can be substituted with candy melts without wax)
Optional Toppings
- Sprinkles
Instructions
- Prepare Peanut Butter Mixture: In a large bowl, combine 1½ cups peanut butter, ½ cup softened butter, 2 cups powdered sugar, and 1 teaspoon vanilla extract. Mix thoroughly until the mixture is smooth and well combined.
- Form Balls: Shape the mixture into 25 evenly sized balls by rolling them with your hands. Place them on a clean surface or tray while preparing the chocolate coating.
- Melt Chocolate Coating: Using a double boiler, bring water to a rolling boil and add 12 oz chocolate chips along with 2 tablespoons grated paraffin wax. Stir continuously until the mixture is smooth and fully melted. If using candy melts, omit the paraffin wax and follow the package instructions.
- Dip Peanut Butter Balls: Use a spoon to dip each peanut butter ball into the melted chocolate, making sure it is completely coated. Place each dipped ball on a rimmed sheet pan lined with wax or parchment paper to set.
- Add Toppings: While the chocolate is still wet, sprinkle holiday-themed sprinkles or drizzle with white chocolate as desired for decoration.
- Chill to Harden: Place the sheet pan in the freezer for about 30 minutes to allow the chocolate coating to harden completely.
Notes
- Store peanut butter balls in an airtight container in the refrigerator for up to 2 weeks.
- Freeze peanut butter balls in a freezer-safe container for up to 3 months.
- If using candy melts for coating, omit the paraffin wax and follow package melting instructions.
- Use parchment paper or wax paper on the tray to prevent sticking during setting.
- For a smoother chocolate coating, stir continuously while melting chocolate and wax over the double boiler.
Nutrition
- Calories: 255 kcal
- Sugar: 20 g
- Sodium: 50 mg
- Fat: 16 g
- Saturated Fat: 7 g
- Unsaturated Fat: 8 g
- Trans Fat: 0.2 g
- Carbohydrates: 25 g
- Fiber: 1 g
- Protein: 4 g
- Cholesterol: 20 mg


