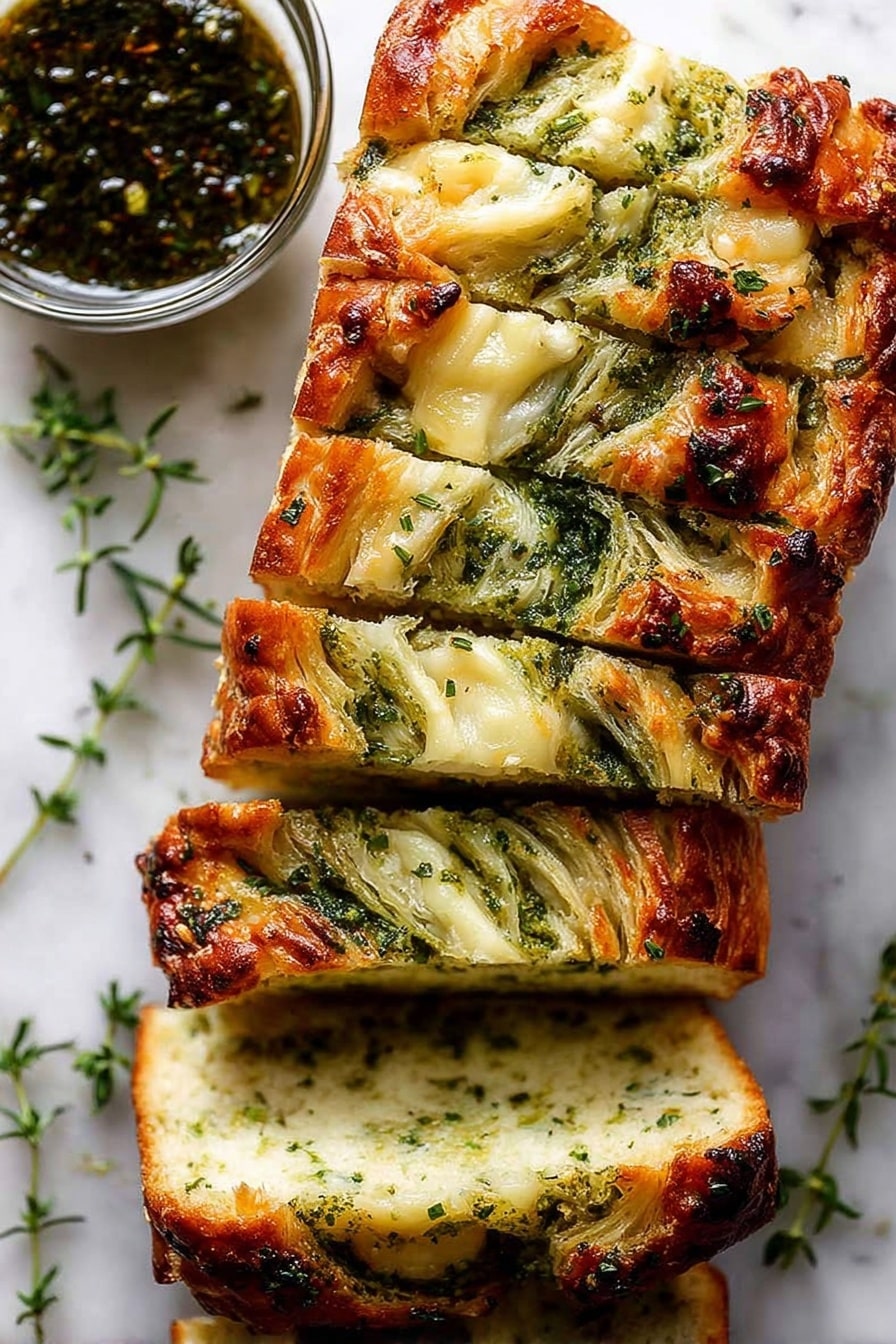
If you’re craving a cozy, flavorful bread that comes together in no time, you’re going to want to stick around for this Cheese, Garlic and Herb Quick Bread (No Yeast) Recipe. It’s like all your favorite savory flavors wrapped up in one gorgeous loaf, with a tender crumb and cheesy pockets that melt in your mouth. Trust me, this isn’t your average quick bread — it’s downright fan-freaking-tastic and perfect for anytime you want to impress without the fuss.
Why You’ll Love This Recipe
- No Waiting on Yeast: You get all the warmth of freshly baked bread without the long rise times.
- Bursting with Flavor: Garlic, fresh herbs, and sharp cheddar swirl together to make every slice irresistible.
- Perfect for Any Occasion: Whether it’s a weeknight snack or a fancy brunch, this bread fits right in.
- Simple Yet Impressive: You don’t need to be a pro baker to nail this one — I’ll walk you through each step.
Ingredients & Why They Work
This Cheese, Garlic and Herb Quick Bread (No Yeast) Recipe blends a few simple ingredients that complement each other so well. The cheese adds gooey pockets of savory goodness, while the fresh and dried herbs bring earthy layers. Plus, the yogurt and baking soda team up to give the bread a tender, moist texture that’s better than a regular quick bread.
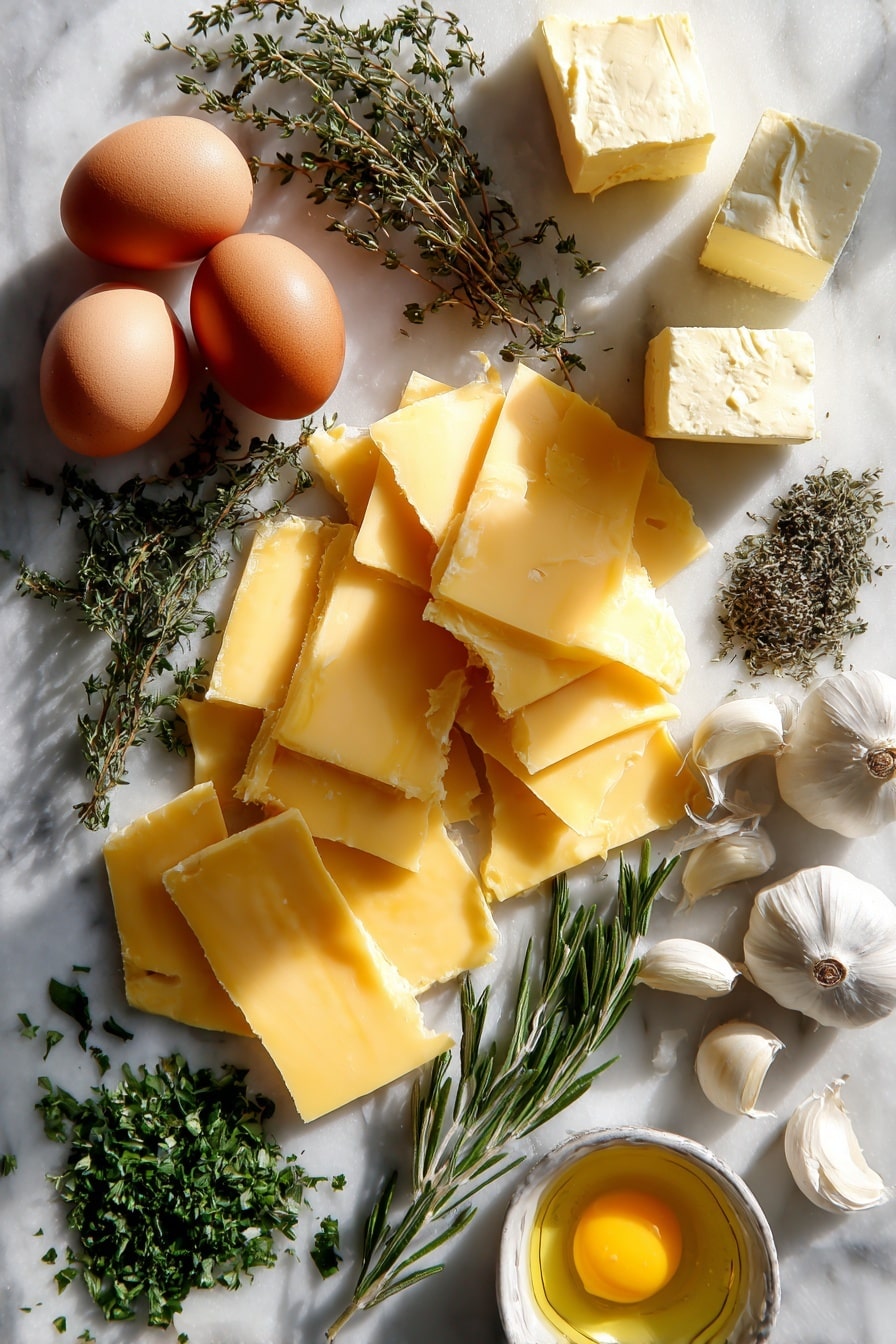
- Cheddar Cheese: I like slicing it into different width ribbons to get little surprises of cheese in every bite.
- Fresh Rosemary and Parsley: These fresh herbs brighten the bread with fragrant, piney and bright notes.
- Dried Oregano and Thyme: They deepen the savory dimension and balance the fresh herbs.
- Garlic: Two different forms (fresh crushed and grated) layer in that classic garlicky punch.
- Plain Flour: The base of the bread, all-purpose flour works perfectly here for a soft crumb.
- Baking Soda and Baking Powder: Together, they give a nice rise without yeast, making it quick and foolproof.
- Yogurt: Adds moisture and slight tang, making the bread super tender.
- Milk and Eggs: These enrich the batter, ensuring a lovely texture and softness.
- Butter and Olive Oil: Both add richness, but olive oil also brings some depth and helps with the herb swirl.
- Salt: Essential for flavor enhancement — just make sure not to skip it!
Note: Exact ingredients and measurements are listed in the recipe card below.
Make It Your Way
One of the best things about this Cheese, Garlic and Herb Quick Bread (No Yeast) Recipe is how easy it is to customize. I often swap in different cheeses or fresh herbs, depending on what I have on hand. Don’t hesitate to put your own spin on it—it’ll still turn out delicious.
- Variation: I love adding chopped sun-dried tomatoes or olives for a Mediterranean twist—perfect for a summer party.
- Dairy-Free Option: You can swap the yogurt for a dairy-free version and use a non-dairy milk like almond or oat milk without changing the texture too much.
- Spicy Kick: Adding a pinch of chili flakes to the herb mix gives a subtle but fun heat that wakes up your taste buds.
- Herb Swaps: Feel free to try basil, tarragon, or dill if rosemary and parsley aren’t your thing—I’ve found the herb swirl is very forgiving.
Step-by-Step: How I Make Cheese, Garlic and Herb Quick Bread (No Yeast) Recipe
Step 1: Prep Like a Pro
First things first, preheat your oven to 180°C (350°F). This bread loves a steady, moderate heat so it bakes evenly. Then, grease your loaf pan with butter or oil spray and line it with parchment paper—trust me, this makes flipping out the bread a breeze and prevents any sticky mess!
Step 2: Whip Up the Herb and Garlic Swirl
Mix your chopped rosemary, parsley, oregano, thyme, crushed garlic, olive oil, and salt in a small bowl until you have a thick, dollop-able mixture. This will be the magic that infuses each slice with fragrant, herbaceous goodness. Take your time here to get a nice blend—this swirl is the star of the show!
Step 3: Combine Dry and Wet Ingredients
Whisk the flour, baking soda, baking powder, and salt in one bowl. In another, whisk together the yogurt, milk, eggs, melted butter, olive oil, and the second batch of crushed garlic. Then, pour the wet into the dry, stirring gently just until combined—you want to avoid overmixing to keep your bread light and tender.
Step 4: Layering the Love
Here’s my favorite fun part: pour a third of your batter into the pan, then dollop on a third of your herb and garlic swirl. Use a knife to swirl it gently through the batter, creating pretty ribbons of green and garlic. Add a third of your sliced cheese, pushing some slices fully in and leaving others peeking out—this creates those delightful melty pockets. Repeat two more layers the same way.
Step 5: Bake to Golden Perfection
Bake for 30 minutes until the top is golden and inviting. Then, cover it with foil and bake for another 20 minutes to make sure the center cooks through without burning the crust. Test with a skewer in the middle—it should come out clean. Let it rest in the pan for 5 minutes, then transfer to a rack and cool at least 10 more minutes before slicing. This wait is torture, but trust me, it’s worth it!
Pro Tips for Making Cheese, Garlic and Herb Quick Bread (No Yeast) Recipe
- Don’t Overmix: Stir the batter only until the dry ingredients disappear—overmixing makes the bread tough.
- Slice Cheese Thinly: Thin, varying-width cheese slices melt beautifully and give that perfect “ribbon” effect.
- Use Fresh Herbs: They keep the loaf fresh and vibrant; dried alone lacks that same punch.
- Check Doneness Carefully: The middle can stay gooey if you skip the foil step—cover it after the top browns to avoid over-browning and cook through.
How to Serve Cheese, Garlic and Herb Quick Bread (No Yeast) Recipe
Garnishes
I usually sprinkle some flaky sea salt and a touch of fresh cracked pepper on top of warm slices. A smear of softened butter or a drizzle of good quality olive oil takes it to the next level. Occasionally, I shred a little extra fresh parsley over the top for that pop of color and freshness.
Side Dishes
This quick bread is a fantastic companion to soups and stews—think creamy tomato soup, roasted butternut squash, or lentil stew. It also pairs wonderfully with a fresh salad or alongside a cheese board for brunch or entertaining.
Creative Ways to Present
For parties, I like slicing the bread into thick “boats” and serving them with little bowls of flavored butters—like herb butter or spicy harissa butter—to make it easy for guests to customize their bites. Another fun idea is to toast the slices and serve as crostini topped with smashed avocado or marinated tomatoes.
Make Ahead and Storage
Storing Leftovers
I wrap leftover bread tightly in plastic wrap and keep it at room temperature for up to two days. It stays surprisingly fresh thanks to the moisture from the yogurt. After that, I move it to the fridge for up to a week, but the first couple of days are always best.
Freezing
This bread freezes beautifully! Slice it beforehand and flash freeze the pieces on a tray, then transfer them to a freezer bag. That way, you can grab only what you need—no wasted bread. It’s best eaten within one to two months for optimal flavor and texture.
Reheating
To revive the bread, I pop slices in a toaster or warm them briefly under the grill. You get that freshly baked warmth, and the cheese melts again delightfully. Avoid microwaving because it can make the bread a bit soggy and chewier.
FAQs
-
Can I use a different type of cheese in this quick bread?
Absolutely! While sharp cheddar is classic, you can experiment with tasty cheese, mozzarella, or even a smoky gouda. Just make sure to slice the cheese thinly for best melting results. Avoid crumbly cheeses that won’t melt well inside the bread.
-
Why doesn’t this recipe use yeast?
This is a quick bread recipe, so it uses baking soda and baking powder for leavening, which means no waiting for dough to rise. It’s a huge time saver and still results in a soft, tender bread with a lovely crumb and great flavor.
-
Can I make this recipe gluten-free?
Yes, but it requires some adjustments. Using a gluten-free all-purpose flour blend that contains xanthan gum should give decent results, though the texture might be a bit different. I recommend experimenting in small batches and keeping the liquids consistent.
-
How do I store leftover Cheese, Garlic and Herb Quick Bread?
Keep leftovers wrapped tightly at room temperature for a couple of days or refrigerate. For longer storage, freeze sliced pieces and thaw as needed to preserve freshness and flavor.
Final Thoughts
This Cheese, Garlic and Herb Quick Bread (No Yeast) Recipe has been one of my go-to cozy snacks and crowd-pleasers. It’s got just the right balance of creamy cheese and fragrant herbs, and it comes together so easily you’ll want to make it again and again. If you’re looking to add a little homemade magic to your day without scheduling a half-day for rising dough, this recipe is your new best friend. Give it a try, and I guarantee it’ll become a kitchen staple you’ll love sharing with friends and family.
Print
Cheese, Garlic and Herb Quick Bread (No Yeast) Recipe
- Prep Time: 15 minutes
- Cook Time: 50 minutes
- Total Time: 1 hour 20 minutes
- Yield: 8 servings
- Category: Bread
- Method: Baking
- Cuisine: Western
Description
A delicious and quick no-yeast bread featuring layers of cheddar cheese and a flavorful herb and garlic swirl, perfect for a savory snack or accompaniment to meals.
Ingredients
Cheese
- 7 oz / 200 g block of cheddar or tasty cheese, cut into 3 mm thick slices with varying widths
Herb and Garlic Swirl
- 2 tbsp fresh rosemary, finely chopped
- 2 tbsp fresh parsley leaves, finely chopped
- 1 tsp dried oregano
- 1/2 tsp dried thyme
- 2 garlic cloves, crushed or finely grated
- 3 tbsp extra virgin olive oil
- 1/2 tsp cooking salt or kosher salt (halve for table salt)
Dry Ingredients
- 2 1/4 cups plain flour (all-purpose flour)
- 1 tsp baking soda
- 3/4 tsp cooking salt or kosher salt (halve for table salt)
Wet Ingredients
- 1/2 cup plain yogurt, Greek or regular (full fat, unsweetened)
- 3/4 cup milk, full fat recommended
- 2 large eggs (~50-55 g each)
- 3 1/2 tbsp (50 g) unsalted butter, melted
- 2 tbsp olive oil
- 2 small garlic cloves, crushed or grated
Instructions
- Preheat Oven: Preheat your oven to 180°C/350°F, suitable for both fan and standard ovens.
- Prepare Loaf Tin: Lightly grease a 21 x 11 x 7 cm loaf pan with butter or oil spray, then line it with baking paper (parchment paper) to prevent sticking.
- Make Herb and Garlic Swirl: In a small bowl, combine the chopped rosemary, parsley, oregano, thyme, crushed garlic, olive oil, and salt to form a thick, dollop-able mixture.
- Mix Dry Ingredients: Whisk together the plain flour, baking soda, and salt in a separate large bowl until evenly combined.
- Mix Wet Ingredients: In another bowl, whisk the plain yogurt, milk, eggs, melted butter, olive oil, and crushed garlic until smooth and blended.
- Combine Ingredients: Create a well in the center of the dry ingredients and pour in the wet mixture. Stir gently until just combined, being careful not to overmix.
- Layer Batter, Herbs, and Cheese – First Layer: Pour one third of the batter into the prepared loaf pan. Dollop one third of the herb mixture on top and use a knife to swirl it through the batter, mixing it in up and down with some turning. Then press one third of the cheese slices randomly into the batter, some fully submerged and others poking out.
- Repeat Layers: Repeat the layering process two more times with remaining batter, herb mixture, and cheese slices, creating beautiful exposed herbs and cheese on top.
- Bake Bread: Bake in the preheated oven for 30 minutes until the top is golden. Then cover the loaf loosely with foil and bake for an additional 20 minutes, totalling 50 minutes of baking.
- Check Doneness: Insert a skewer or toothpick into the center of the bread to ensure it comes out clean, indicating it is fully cooked.
- Cool Bread: Allow the bread to cool in the loaf tin for 5 minutes before removing it onto a cooling rack. Let it cool for at least another 10 minutes before slicing into thick pieces.
- Serve: Optionally, spread with butter and enjoy as a savory snack or accompaniment to your meal.
Notes
- Use a mix of cheese slice widths for a more interesting texture and appearance.
- If using table salt, reduce the quantity in the recipe by half to avoid over-salting.
- Layering the herb mixture and cheese creates a visually appealing marbled effect throughout the bread.
- Ensure not to overmix the batter to keep the bread light and tender.
- Allow the bread to cool properly before slicing to maintain its structure.
- This bread can be kept in an airtight container for 2-3 days or frozen for longer storage.

