

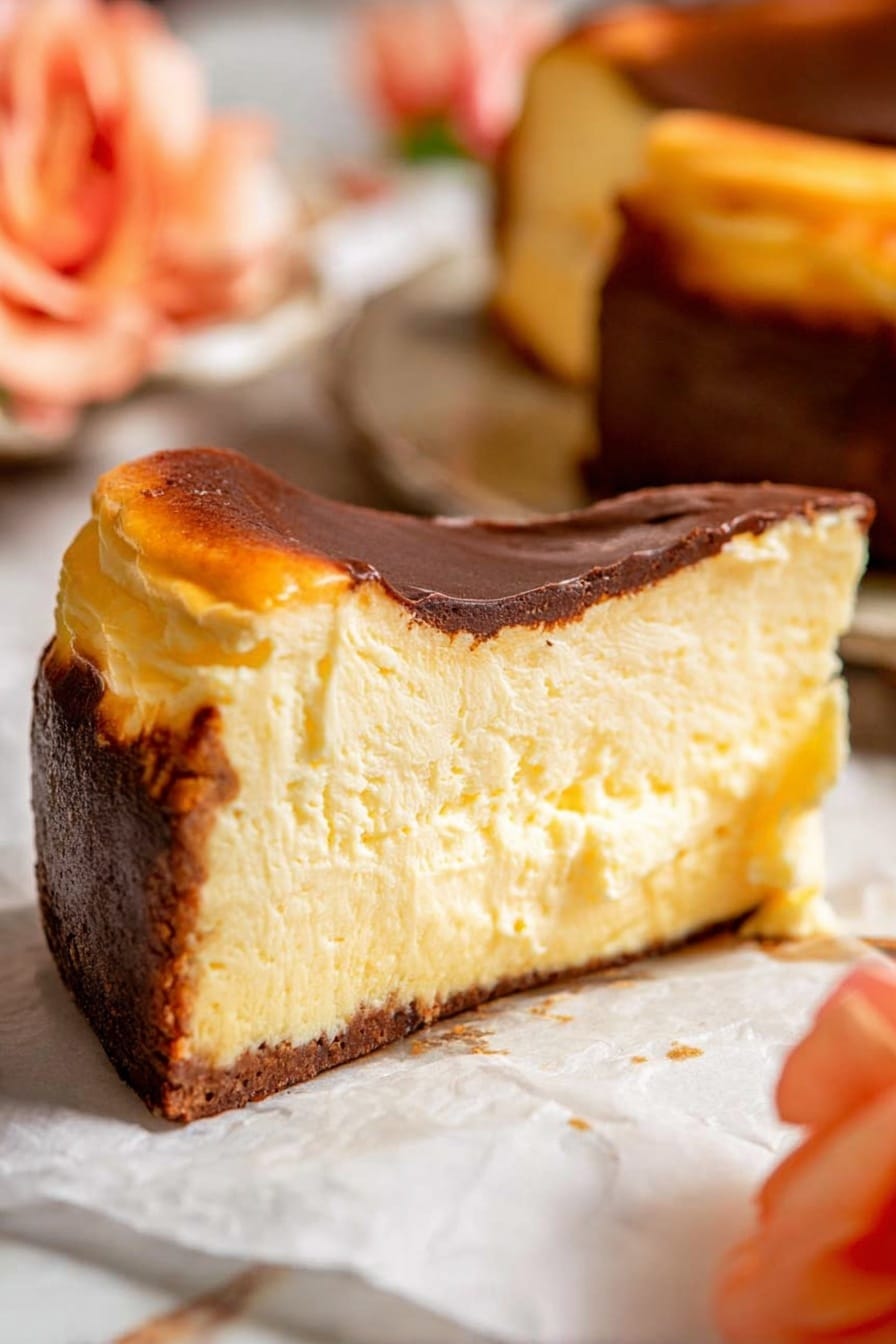
If you’re after a dessert that’s creamy, rich, and just a little bit rustic, this Basque Cheesecake Recipe is going to become your new favorite. I promise you, once you try it, you’ll understand why it’s been stealing hearts around the world with its burnt caramelized top and irresistibly soft center. It’s surprisingly straightforward to make at home, and I’m here to walk you through every step so you nail it just like a pro.
Why You’ll Love This Recipe
- Minimal Ingredients: You don’t need a pantry full of fancy stuff; simple basics come together beautifully.
- Rustic Charm: Its imperfect, burnt edges make it look bakery-worthy without the stress.
- Decadent Texture: Creamy yet firm in the center, with a caramelized top you’ll want to dig into every time.
- No Crust Required: Skip the fiddly crust and still get incredible flavor and texture.
Ingredients & Why They Work
The magic of this Basque Cheesecake Recipe is all in the balance of simple, quality ingredients coming together in harmony. From creamy cream cheese to just the right amount of eggs and sugar, these ingredients create that silky texture and that signature caramelized crust you’re craving. Let me share a few tips on each ingredient that will make your cheesecake stand out.
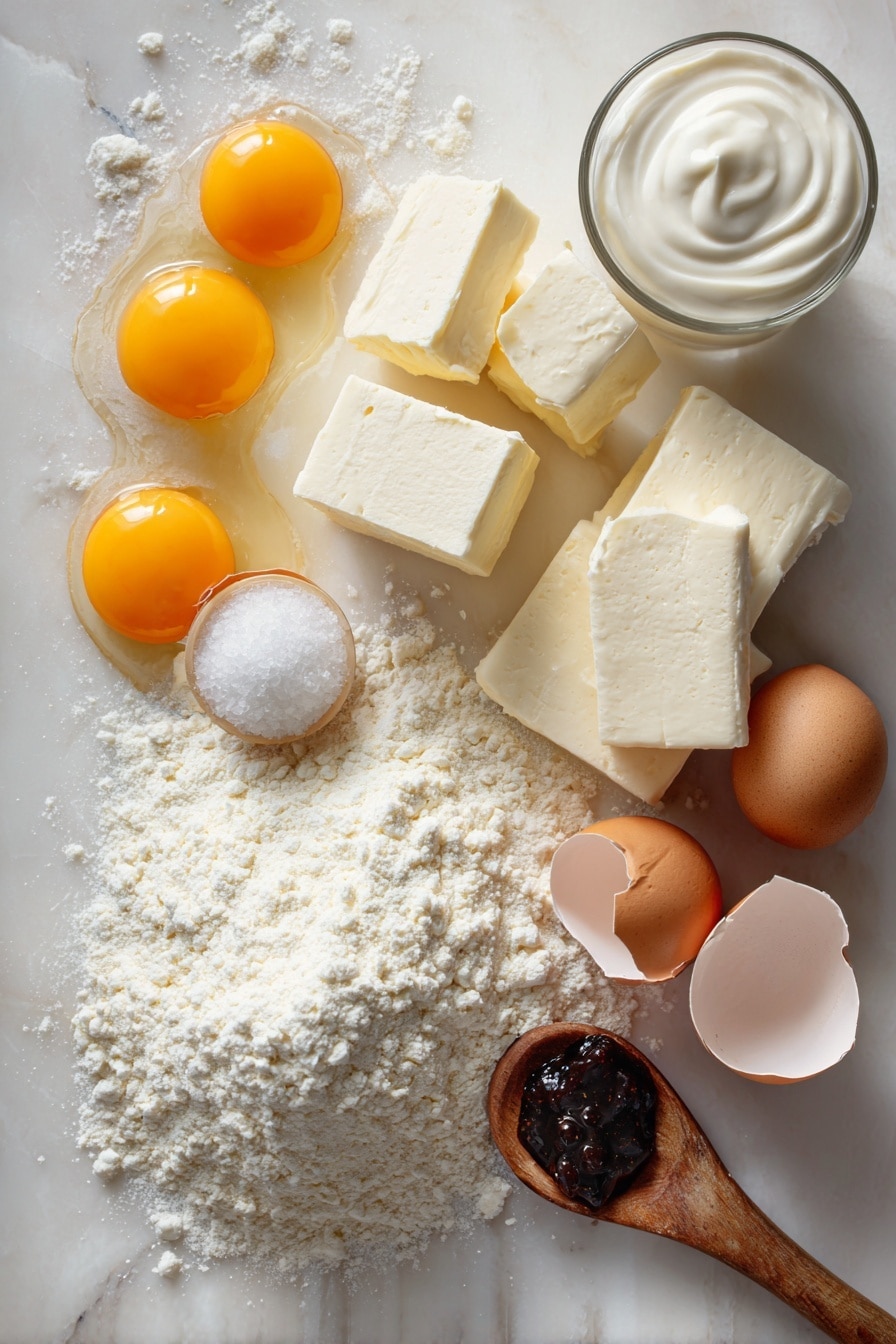
- Cream Cheese: Make sure it’s at room temperature so it blends seamlessly for that ultra-smooth batter.
- Sugar: Caster or superfine sugar works best for dissolving quickly, but regular white sugar is just fine if that’s what you have.
- Whipping Cream: Take it out of the fridge 15 minutes ahead to soften for easy mixing.
- Flour: Just a small amount to stabilize the batter without making it cakey.
- Vanilla Bean Extract or Paste: Adds a lovely fragrant hint, elevating the flavor without overpowering it.
- Eggs: Use room temperature and *measure them* carefully — the right ratio makes a big difference!
Note: Exact ingredients and measurements are listed in the recipe card below.
Make It Your Way
I love how versatile the Basque Cheesecake Recipe is—you can keep it classic or add your twist depending on your mood. I’ve tried adding cinnamon for a warm touch and even a splash of citrus zest for brightness, and both were delightful. Don’t be afraid to play around!
- Variation: Once, I swapped vanilla for bourbon vanilla and it added such a deep, complex flavor that everyone raved about at the dinner table.
- Dietary Modifications: If you need it gluten-free, substitute the flour with a gluten-free blend—just make sure it can absorb moisture well.
- Texture Tweak: For an extra creamy center, slightly underbake it and let it chill longer for perfect slicing.
Step-by-Step: How I Make Basque Cheesecake Recipe
Step 1: Prepping Your Pan for Rustic Perfection
Start by preheating your oven to 220°C (425°F), with the rack in the middle. Take two large sheets of parchment paper, scrunch them up, then press them into your 20cm (8-inch) springform pan, folding any extra paper over the sides to hold it in place. This crinkly paper lining creates those charming rustic edges that give Basque cheesecake its signature look. Don’t stress if the paper doesn’t stick firmly—it will be weighted down by the batter.
Step 2: Whip Your Cream Cheese to Silky Smooth
Using an electric mixer on medium speed, beat your room-temperature cream cheese for about 2 minutes until it’s completely smooth and free of lumps. Scrape down the bowl sides once or twice—that’s key for an even batter. Add the sugar and mix on low speed for just 10 seconds to blend it in gently without adding air bubbles.
Step 3: Mix Your Flour and Cream Just Right
In a separate bowl, combine a quarter cup of the cream with the flour using a hand whisk until smooth and paste-like—this step helps avoid lumps. Slowly whisk in the rest of the cream and the vanilla extract or paste until fully incorporated. This mixture will be pourable but not whipped, so keep it smooth and fluid.
Step 4: Combine and Incorporate Eggs with Care
With your mixer on low, slowly pour the cream mixture into the cream cheese bowl and combine gently. Then, pour in your lightly whisked eggs bit by bit, still on low speed, blending just enough to combine. Stop mixing as soon as the eggs are incorporated—overbeating can trap air and cause cracks during baking.
Step 5: Bake to Golden-Brown Glory
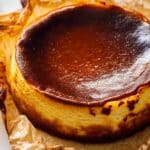
Pour the batter into your prepared pan. Bang the pan firmly on the counter a few times to remove big air bubbles, then use a sharp small knife to pop any bubbles rising to the surface—repeat this 3 to 5 times for a smooth top. Pop it in your hot oven and bake for about 45 minutes, but don’t be surprised if it takes up to 65 depending on your oven; you want a deep golden brown, almost burnt top. The center will still be wobbly—that’s perfect!
Step 6: Cool and Chill for the Best Texture
Leave your cheesecake to cool in the pan on the counter for at least 2 hours—it will naturally sink a little and that’s totally normal. Then refrigerate uncovered for at least 8 hours or overnight. This step lets all those luscious cream flavors settle and firm up to that iconic texture we love.
Pro Tips for Making Basque Cheesecake Recipe
- Room Temperature Ingredients: Always prep your cream cheese and eggs ahead to avoid lumps and cracking.
- Don’t Overbeat: Overmixing causes air bubbles that lead to cracks—mix just until combined.
- Keep an Eye on Baking Time: Ovens vary, so check after 45 minutes and watch for that perfect golden crust without burning.
- Cool Slowly: Chill uncovered so the top crisps and the inside sets for that unmatched creamy texture.
How to Serve Basque Cheesecake Recipe
Garnishes
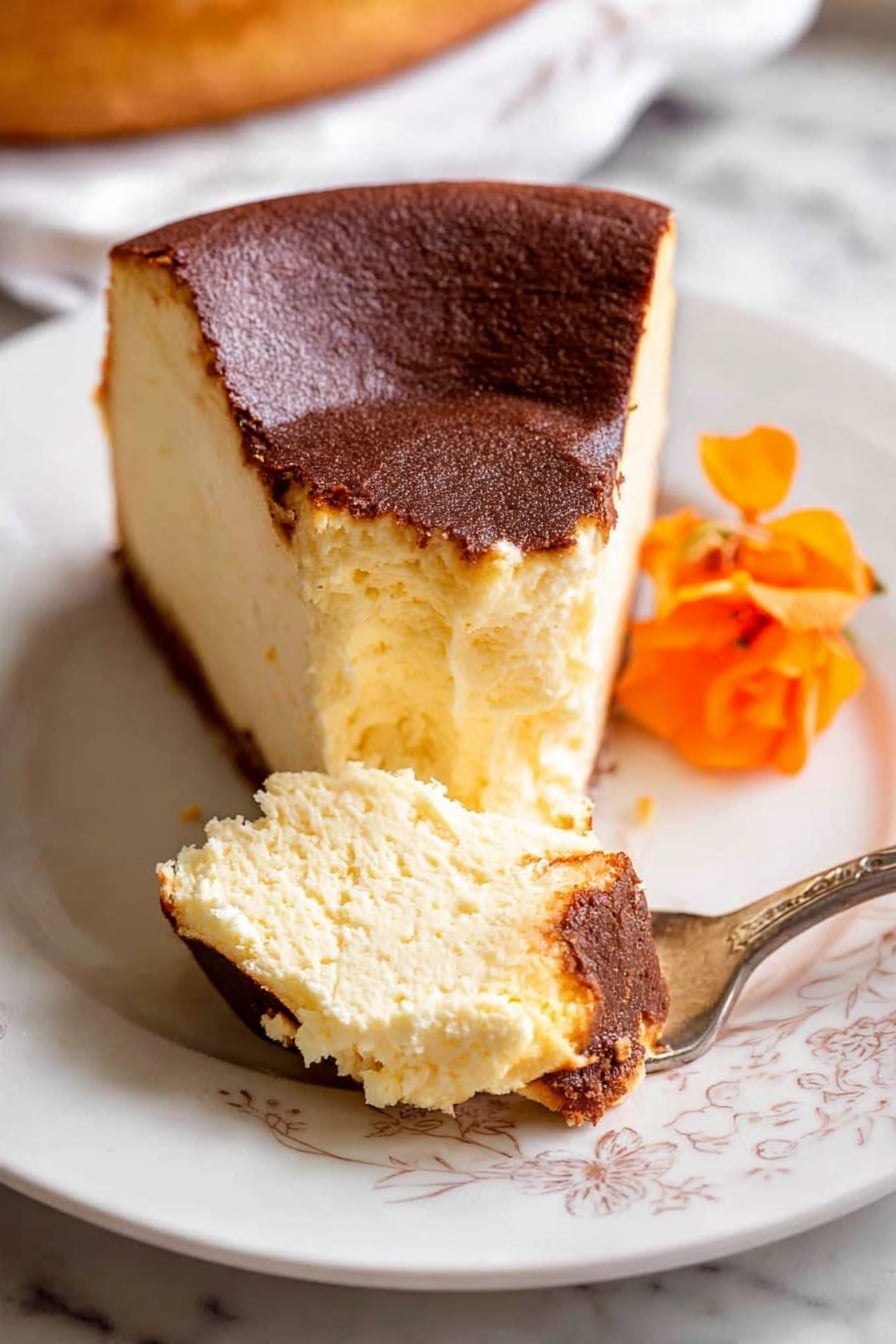
I love serving this cheesecake just as it is—the caramelized burnt top and creamy center are the stars. But if you want to jazz it up a bit, a few fresh berries or a light dusting of powdered sugar can add a lovely contrast. I’ve also drizzled a tiny bit of honey or a spoonful of fruit compote on the side for an extra touch without overwhelming the flavor.
Side Dishes
Pair it with a cup of strong espresso or a glass of dessert wine for a delightful finish to any meal. A simple bowl of fresh fruit is also great to lighten the richness if you’re serving it after a heavy dinner.
Creative Ways to Present
For celebrations, I’ve wrapped the base with decorative parchment and tied a kitchen twine bow around it—it makes this humble cheesecake look festive. You could also serve small slices on a rustic wooden board surrounded by edible flowers for a charming presentation that’s sure to impress guests.
Make Ahead and Storage
Storing Leftovers
Once your Basque cheesecake is chilled, keep it covered loosely with plastic wrap or in an airtight container in the fridge. It stays fresh and delicious for up to 4 days. I often slice it before storing to make grabbing a piece easier on busy days.
Freezing
You can freeze this cheesecake successfully! Slice it first, wrap individual pieces tightly in plastic wrap, then foil, and stash in the freezer. When you’re ready to enjoy, thaw overnight in the fridge for best texture.
Reheating
I usually enjoy Basque cheesecake cold or at room temperature. If you prefer it warmer, let it sit out for 30 minutes before serving—this brings out the creamy texture and deepens the flavor without losing its signature shape.
FAQs
-
What makes Basque cheesecake different from regular cheesecake?
The Basque cheesecake is known for its intensely caramelized, almost burnt top and creamy, custardy center, unlike traditional cheesecakes that have a smooth but unbrowned surface and often a crust. Its simplicity, without a crust, and high-temperature baking give it a unique rustic and rich character.
-
Can I use a regular cake pan instead of a springform pan?
A springform pan is ideal because it allows you to easily release the cheesecake without disturbing its delicate edges and rustic paper lining. If you use a regular cake pan, be sure to line it thoroughly with parchment and handle the cheesecake gently when removing it.
-
Why does the cheesecake sink after baking?
Sinking is totally normal for Basque cheesecake. Its center is soft and custardy, and as it cools, it naturally deflates. This is part of its signature texture and is perfectly fine.
-
Can I make the Basque cheesecake ahead of time?
Absolutely. In fact, it tastes better after resting in the fridge for at least 8 hours or overnight, which allows the flavors to meld and texture to set perfectly.
Final Thoughts
Honestly, this Basque Cheesecake Recipe feels like the perfect dessert for any occasion—from casual family dinners to impressing guests without breaking a sweat in the kitchen. Its ease, combined with that unforgettable creamy texture and golden, crackled top, makes it a staple in my home and hopefully yours too. Give it a go—you’ll be amazed how something so simple can taste so insanely delicious and sophisticated.
PrintBasque Cheesecake Recipe
Classic Basque Cheesecake is a creamy, caramelized crust dessert with a rustic appearance and a rich, smooth interior. This recipe uses cream cheese, cream, eggs, and flour to create a deeply golden, slightly burnt top with a custardy center, perfect for an impressive yet simple treat.
- Prep Time: 15 minutes
- Cook Time: 45 minutes
- Total Time: 9 hours
- Yield: 12 servings
- Category: Dessert
- Method: Baking
- Cuisine: Spanish
Ingredients
Cheesecake Batter
- 750 g cream cheese blocks, room temperature
- 1 cup caster sugar (regular white sugar ok too)
- 1 1/4 cups whipping cream, taken out of fridge 15 minutes prior
- 1/4 cup plain/all-purpose flour
- 1 tsp vanilla bean extract or paste
- 3/4 cups + 1 tbsp lightly whisked eggs (about 4-5 large eggs), at room temperature
Instructions
- Preheat Oven – Preheat your oven to 220°C / 425°F (200°C fan) with the rack placed in the middle position to ensure even baking.
- Prepare Pan – Scrunch 2 sheets of 40cm/16″ baking or parchment paper and press them into a 20cm/8″ springform pan, folding it over the edges to hold in place. This creates the signature rustic sides and will hold the batter securely despite the paper pleats.
- Beat Cream Cheese – In a large bowl, beat the cream cheese on medium speed for 2 minutes until smooth and lump-free, scraping down the sides as needed. Then add the sugar and beat on low for about 10 seconds to combine.
- Prepare Flour Cream Mixture – In a separate medium bowl, mix about 1/4 cup of the cream with all the flour until lump-free, forming a paste. Slowly whisk in the remaining cream until fully incorporated, then stir in the vanilla extract. The texture should be pourable and not whipped.
- Combine Mixtures – With the mixer on low speed, slowly pour the cream mixture into the cream cheese mixture and beat just until combined. Then gradually add the lightly whisked eggs, continuing to beat on low and stopping immediately once combined to minimize air bubbles.
- Remove Air Bubbles – Pour the batter into the prepared springform pan. Firmly bang the pan on the countertop several times to release bubbles and use a small sharp knife to pop any bubbles on the surface, repeating 3 to 5 times.
- Bake – Bake for 45 minutes or until the top is deeply golden brown and caramelized. It may take up to 65 minutes depending on the oven; monitor closely during the last 15 minutes to prevent burning. The center will still wobble and rise like a soufflé.
- Cool and Chill – Allow the cake to cool in the pan on the counter for at least 2 hours; it will naturally sink slightly. Then refrigerate uncovered for a minimum of 8 hours to set completely.
- Serve – Release the springform sides, gently lifting the cake on the parchment paper base onto a serving plate. The rustic paper adds to the presentation. Let the cheesecake come to room temperature for 30 minutes if preferred, though it’s also excellent served chilled. Cut into slices and enjoy as is—no accompaniments needed.
Notes
- Using room temperature ingredients ensures smooth, lump-free batter and even baking.
- Parchment paper scrunching creates signature rustic edges—don’t skip this step.
- Be careful not to overbeat after adding eggs to avoid excess air bubbles that can cause cracking.
- Watch the cake closely near the end of baking to achieve the ideal deep golden brown color without burning.
- The cheesecake center will be slightly jiggly when done; it firms up during chilling.
- Served chilled or at room temperature, it pairs beautifully with fresh berries but is delicious plain.
- Use a sharp knife dipped in hot water and wiped dry for clean slices.


